Category Archives: Mystery Technique

Mystery Technique

Mystery Technique #97


Want to know which techniques I used in this painting? You can find out next month if you’ve signed up for email updates!

ANSWER TO MYSTERY TECHNIQUE #96:

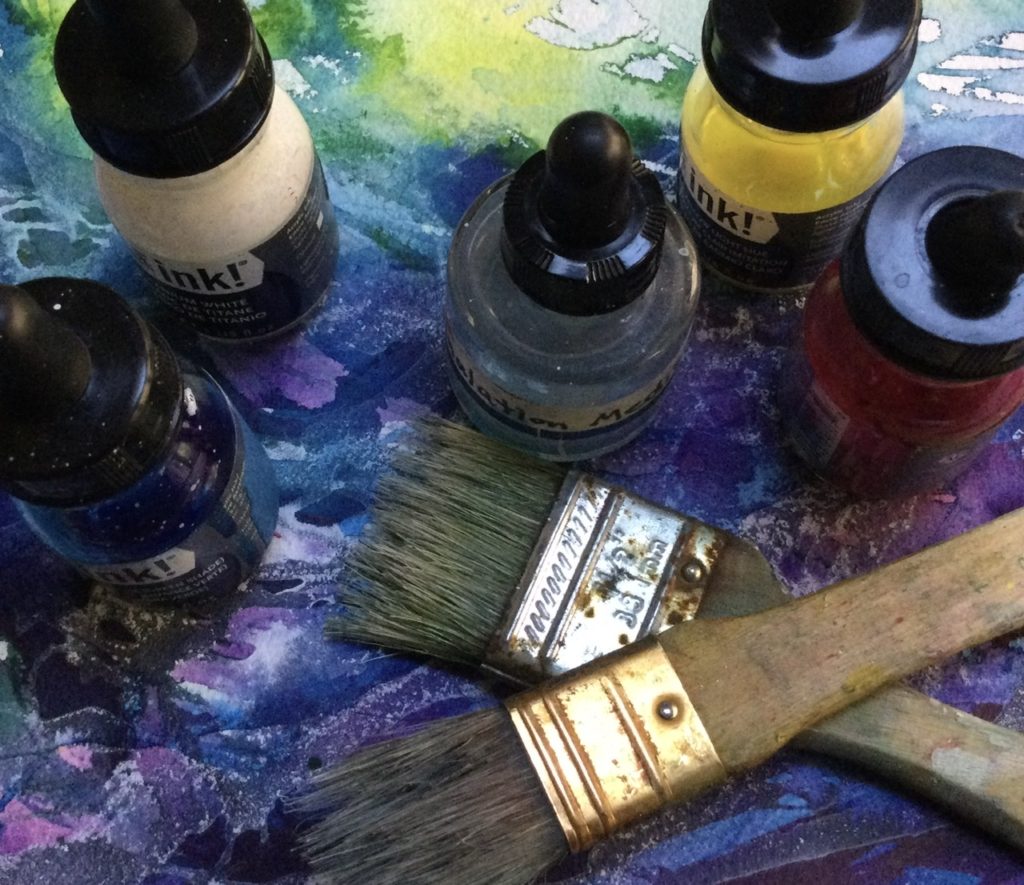
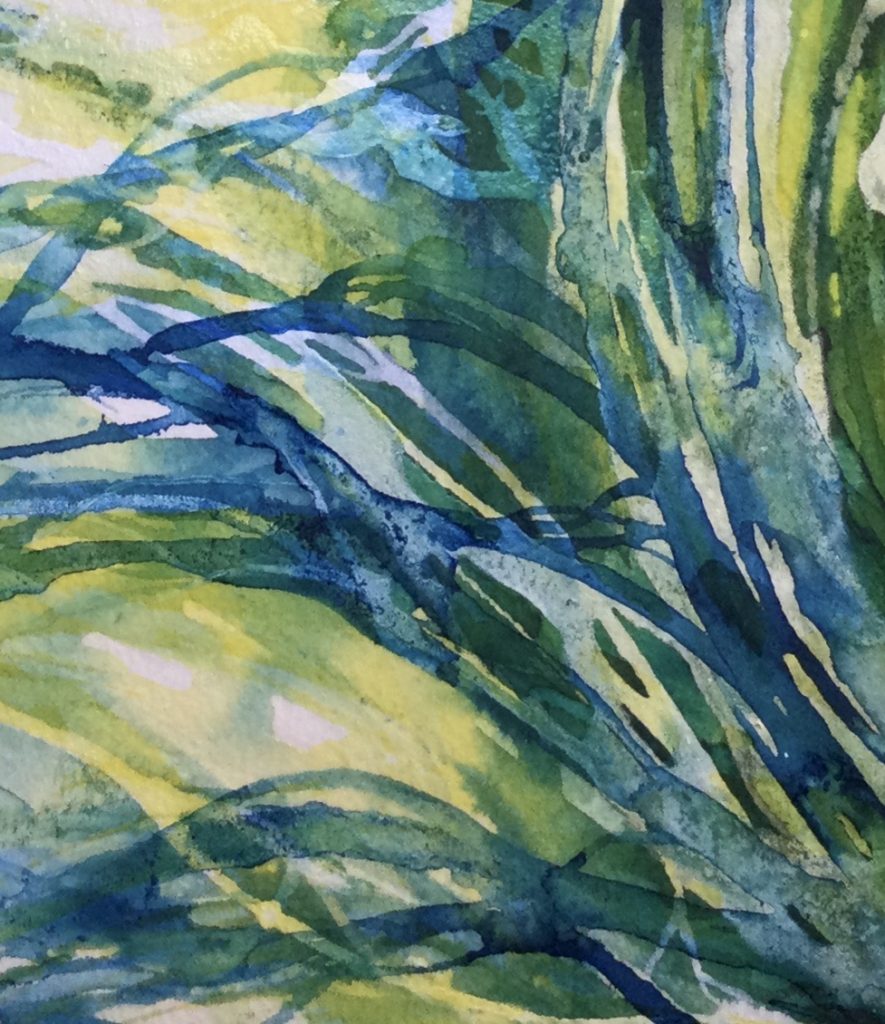
This is another one of my dream painting experiments using diluted acrylic inks, Winsor & Newton’s Granulation Medium, and my favorite modified brushes. To personalize the brushes, I used sharp scissors to cut uneven triangles out of the stiff hog bristles. I love the varied marks they make, from irregular strokes to dry brush textures to small dots! It all depends on how you hold them and how much water you’re using. After making some strokes with just water, I dropped in diluted Phthalocyanine Blue (green shade), Quinacridone Magenta, and Cadmium Yellow Light Hue. When the first layer dried, I repeated the process with darker versions of the same colors, sometimes using the droppers inside the bottles for thinner marks. The last layer is extremely diluted Titanium White with lots of Granulation Medium. I tilted the paper slightly to exaggerate the texture.

Mystery Technique

Mystery Technique #96

Want to know which techniques I used in this painting? You can find out next month if you’ve signed up for email updates!

ANSWER TO MYSTERY TECHNIQUE #95:

The secret ingredient is rain! Laura Huff and I taught a Dream Energy Painting Workshop shortly before Nashville’s Pandemic lockdown. It was sprinkling when I left the workshop, and the raindrops reactivated the paint to create assorted light dots ringed with darker outlines. Sargent Art’s Watercolor Magic liquid paints are great for expressive painting workshops; since some participants fling the paint a little too wildly with unusual tools like the turkey feather shown above, it’s nice to supply washable paint!

Mystery Technique

Mystery Technique #95

Want to know the special ingredient for this technique? It’s not salt! You can find out the details next month if you’re signed up for email updates!

ANSWER TO MYSTERY TECHNIQUE #94:

Here are the materials I used to turn a painting on paper into a three-dimensional object:

After finishing the painting, I placed it facedown on a piece of wax paper. Working quickly, I used a brush to apply PVA adhesive in a starburst pattern, then spread it evenly. Next I positioned a Claybord panel on top and ran the brayer over the back of the panel. To be sure there weren’t any air bubbles, I turned it over, put a clean piece of waxed paper on top of the painting, and ran the brayer over it, pressing firmly. After the adhesive dried, I used a craft knife to cut off the excess paper on each side:

Next I painted the white cut edges with acrylic. To continue the painting on the sides and top, I repeated the process. I painted the bottom with a bluish black acrylic:

To varnish it, I started with 2 thin coats of a non-yellowing spray fixative. After that dried, I brushed on 3 thin coats of acrylic varnish.